-
Create a working diretory for Code Bubbles.
You will want to have a separate directory for installing Code Bubbles. Lets assume this is ~/bubbles.ext (i.e. bubbles.ext inside your home directory). Then in a shell (terminal, xterm, etc) window execute:
$ cd # go to home directory
$ mkdir bubbles.ext
$ cd bubbles.ext
-
Install a Writable version of Eclipse
This varies with the machine you are running on and the version of Eclipse you want to install. You need a version of Ecilipse that includes Java (Java, Enterprise Java). The easiest way to do this is to go to the Eclipse download page, click on Download for your architecture and follow the directions. If you have previously installed Eclipse (and you have permission to update it and install files in its plugins directory) this step can be skipped. Eclipse can be installed anywhere on your system. If you don't have a better place for it, you can install it in ~/bubbles.ext/eclipse.
-
Download the Code Bubbles jar.
The easiest way to do this is to click on the bubbles.jar link. Then copy the downloaded file into the directory you created:
-
Install and set up Code Bubbles.
To do this you need to run the jar file. This can be done through the shell:
$ java -jar bubbles.jar
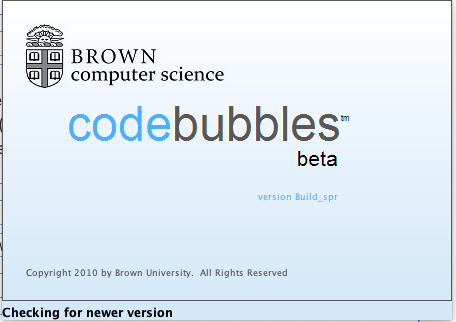
Or (in most cases) double clicking on the bubbles.jar file in the given directory. This should start up with the splash screen:
and then display the dialog box asking for the location of Eclipse:
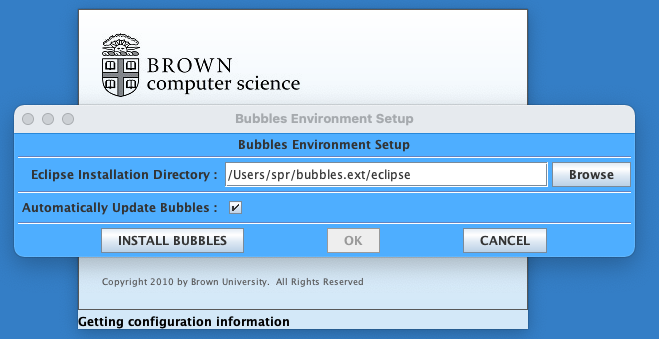
Here you should enter the location of the Eclipse installation. (As noted, if you used ~/bubbles.ext/eclipse it finds it for you; otherwise enter the directory containing the ecipse binary.) Once done, click on INSTALL BUBBLES and then click on OK. This will yield the dialog asking for a workspace:
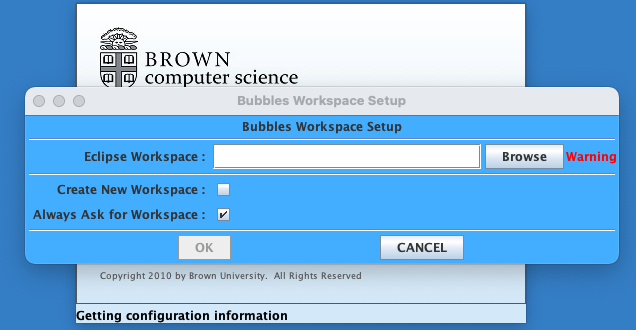
At this point Code Bubbles is installed and you should click CANCEL. This dialog will appear again when you start actually using Code Bubbles. Part of the installation should have created a .bubbles directory in your home directory. This directory contains the property files that customize bubbles for you.
-
Set up a command shortcut (Optional).
You can now set up a command short cut to make it easier to run Code Bubbles from the command line. This should execute
java -jar <path>/bubbles.jar
where <path> is replaced with the installation directory (e.g., ~/bubbles.ext). Alternatively, in the bin subdirectory of the installtation directoy, there is a file extcodebb that will read the location from your .bubbles directory and start Code Bubbles. You can move and rename this (I use codebb) to a directory on your path (e.g. /usr/local/bin). Note that extcodebb only works once you have installed and run Code Bubbles once (i.e. will not work for other users initially).
-
Run Code Bubbles for the First Time
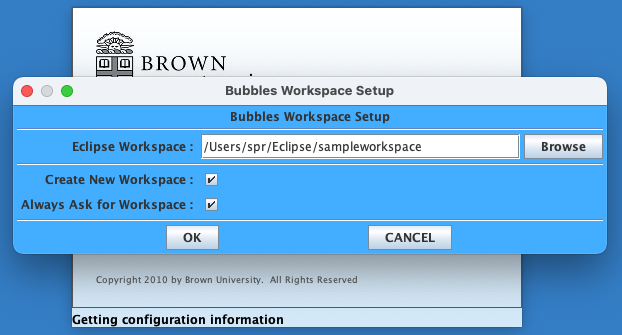
Now you are ready to run Code Bubbles. If you have an existing Eclipse project, it is probably simplest to use it directly. Start Code Bubbles (either using the command short cut or running 'java -jar bubbles.jar' in the installation directory) to get the dialog pictured above asking for the Eclipes workspace. If you have an existing workspace, just enter the path into the appropriate box and click OK. If not, you will need to create one. You can do this with Eclipse directly or using Code Bubbles. Suppose we want to create a new workspace in ~/Eclipse/samplewokspace. We enter this directory into the dialog, check Create New Workspace and then click OK.
This will proceed to the next dialog, asking what color palette you want to use:
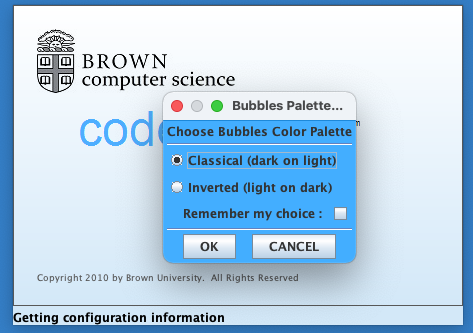
I prefer dark text on a light background and choose that, but you may have different preferences. Note that this dialog will recur when you restart Code Bubbles unless you check Remember my choice. Because this is the first time running Code Bubbles, the system will next ask you for monitoring preferences:
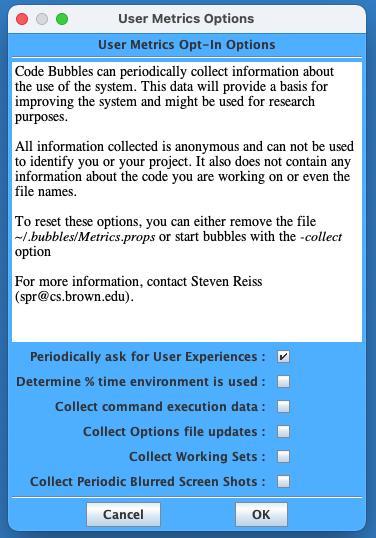
Code Bubbles has the ability to collect usage data in order to let us monitor and improve the system. This data is completely anonymous and contains no information about you or about the code you are working on. By default, the only thing checked is to periodically ask for User Experiences (which we almost never do). You should check (or uncheck) the options you want to allow here and then click on OK. This will proceed to the bug monitoring dialog:
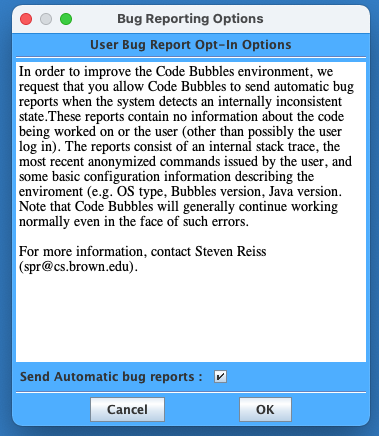
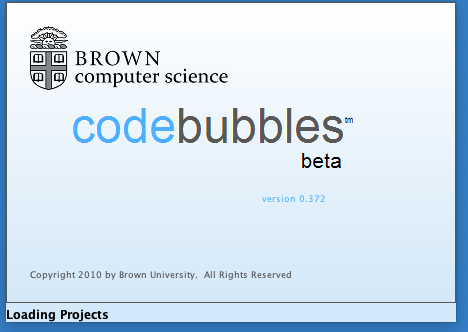
When Code Bubbles experiences an unexpected situation (e.g., a NullPointerException), it will recover appropriately, but can send in a bug report consisting of the stack trace and a bit of information about the circumstances of the problem. We look at these periodically (i.e., most days) and try to fix any problems as we find them. While it is helpful for us to receive such reports, you have the option of not sending them. Check or uncheck the box as you wish, and then click OK to proceed. Now Code Bubbles will start for real. You should see a splash screen showing the start up progress:
Eventually (it might take a little while to download the current javadoc), you should see Code Bubbles. The bubble on the right is the package explorer. It provide a means for searching for code by typing in fragments of the class or method name. The menu bar on the left provides a set of common options (search, text search, rebuild, reload) and can be toggled with F1. At the top of the display is the overview area. The blue rectangle shows what is currently being viewed. You can easliy click elsewhere in this area to get a new working area or click back to resume previous work. At the upper right are menus for various operations. The most useful is for debugging. If you started with a new workspace, you should see a screen such as:
The bubble on the right is the package explorer. It provide a means for searching for code by typing in fragments of the class or method name. The menu bar on the left provides a set of common options (search, text search, rebuild, reload) and can be toggled with F1. At the top of the display is the overview area. The blue rectangle shows what is currently being viewed. You can easliy click elsewhere in this area to get a new working area or click back to resume previous work. At the upper right are menus for various operations. The most useful is for debugging.
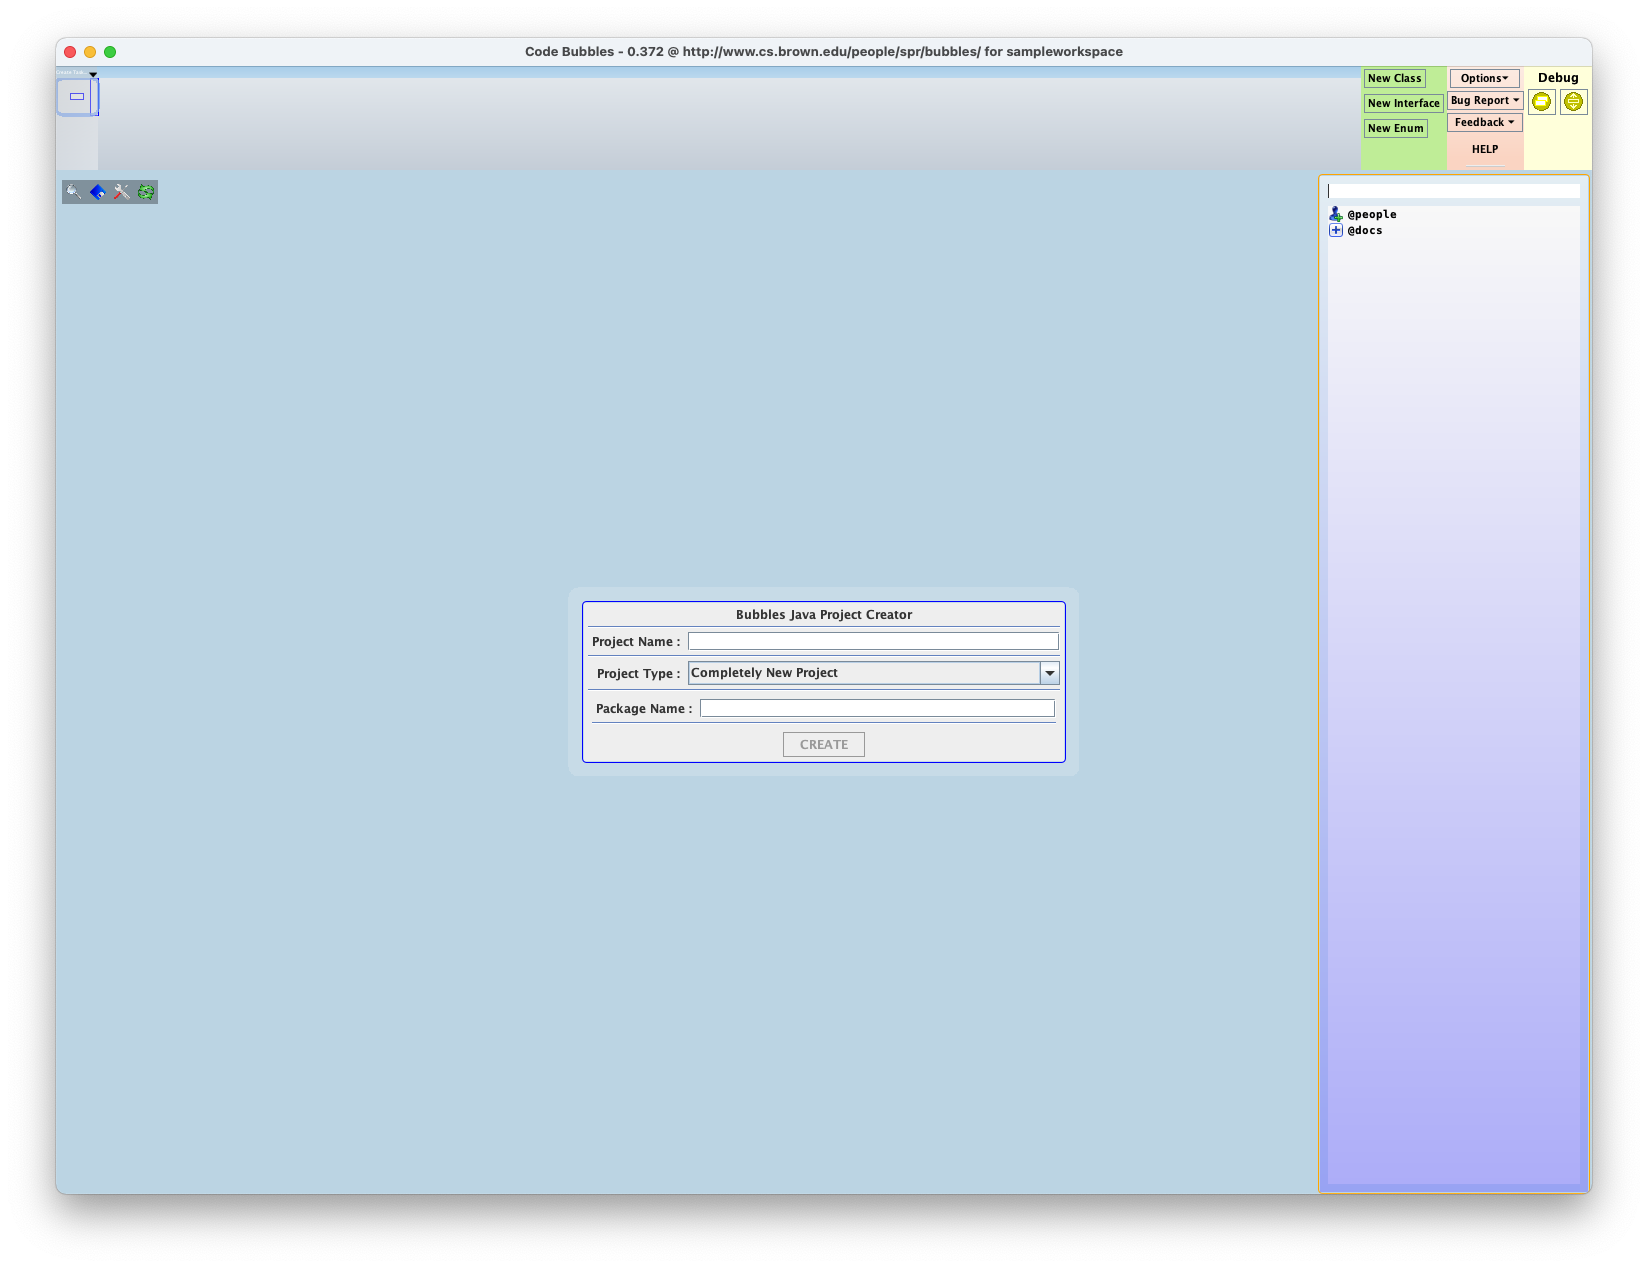
With a new project, Code Bubbles creates a dialog bubble to help you set up the initial project. This dialog gives you a few options. Choosing "Completely New Project" will create a simple Hello World project inside the workspace. Alternatively, if you have existing Java code you would like to use, you can choose "Create Project Using Existing Source" to work on that code where it currently is or "Create Project Copying Existing Source" to copy that source into the Eclipse workspace and work on the copied code. Other alternative are being worked on. Note that if you using existing code and point to a directory, Code Bubbles will look for Jar files in that directory and assume they are needed for the project. It does not always get this right and you will have to correct this by adding or removing from the classpath. This can be done by right clicking on the project in the package explorer. Also, if you leave the mouse in a set position on the screen, you will get a help bubble similar to:
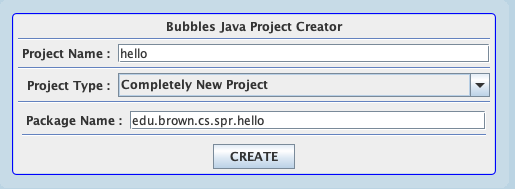
This provide you with textual help or a demo of what to do with voiceover. If we were going to create a new sample project, we could fill in the project creator dialog with the project name and the initial package as below and then press CREATE.
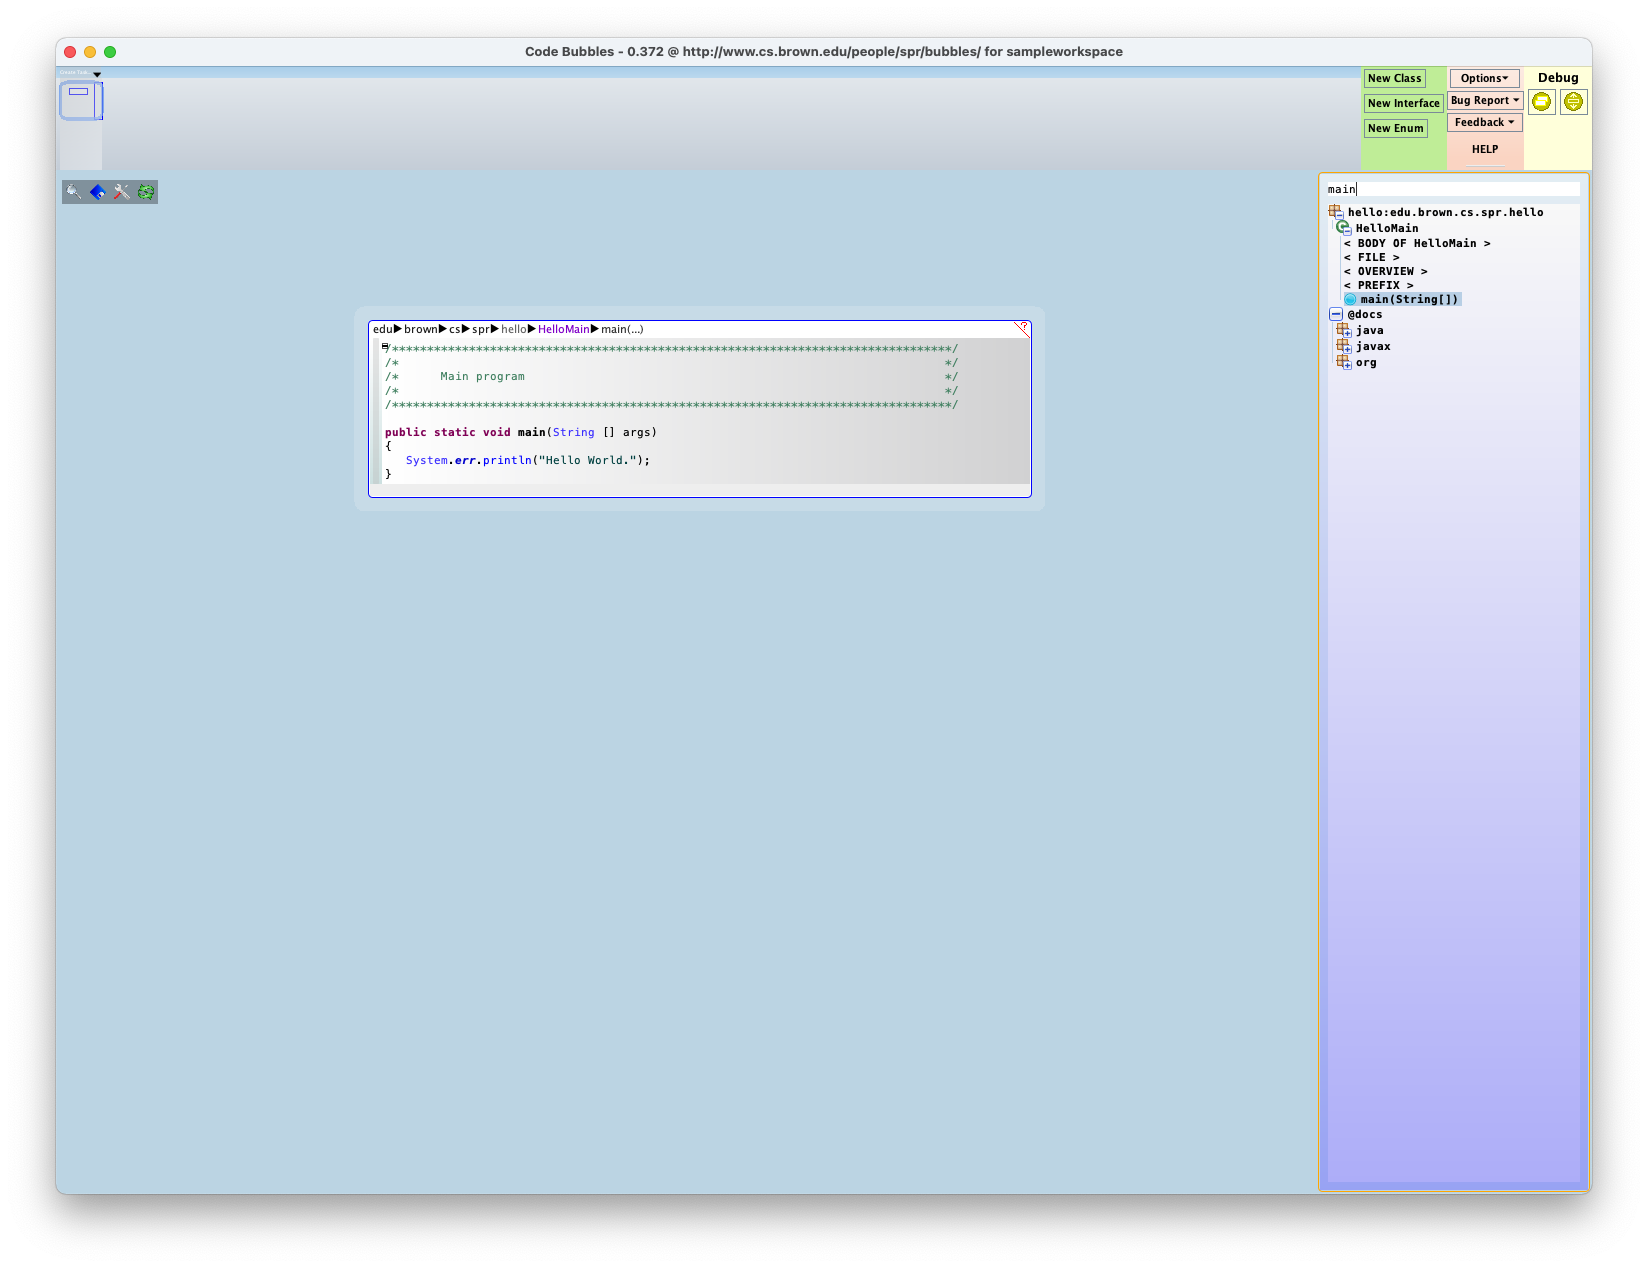
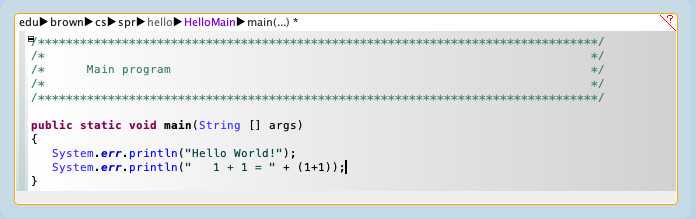
This creates a new project and updates the package explorer. Typing 'main' into the package explorer will show all classes or methods with main in the name. We can the click on the main method of HelloMain to show the method in a bubble:
This bubble is an editor (with pretty much the same key bindings as the Eclipse code editor). Suppose we edit the code a little:
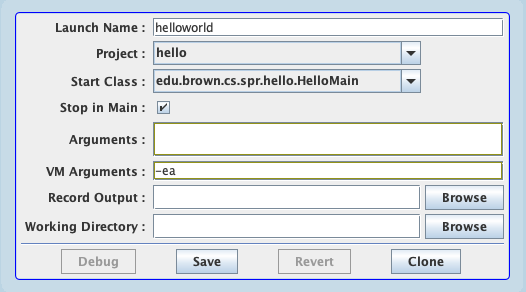
Then we go to the upper right and right clock on the right-most icon under debug and select new Java application (or just left-click on the left icon under debug). This pops up a launch configuration dialog in which we change the name of the launch:
Then we click 'Save' and then 'Debug'. Code Bubbles automatically goes to the debugger view:
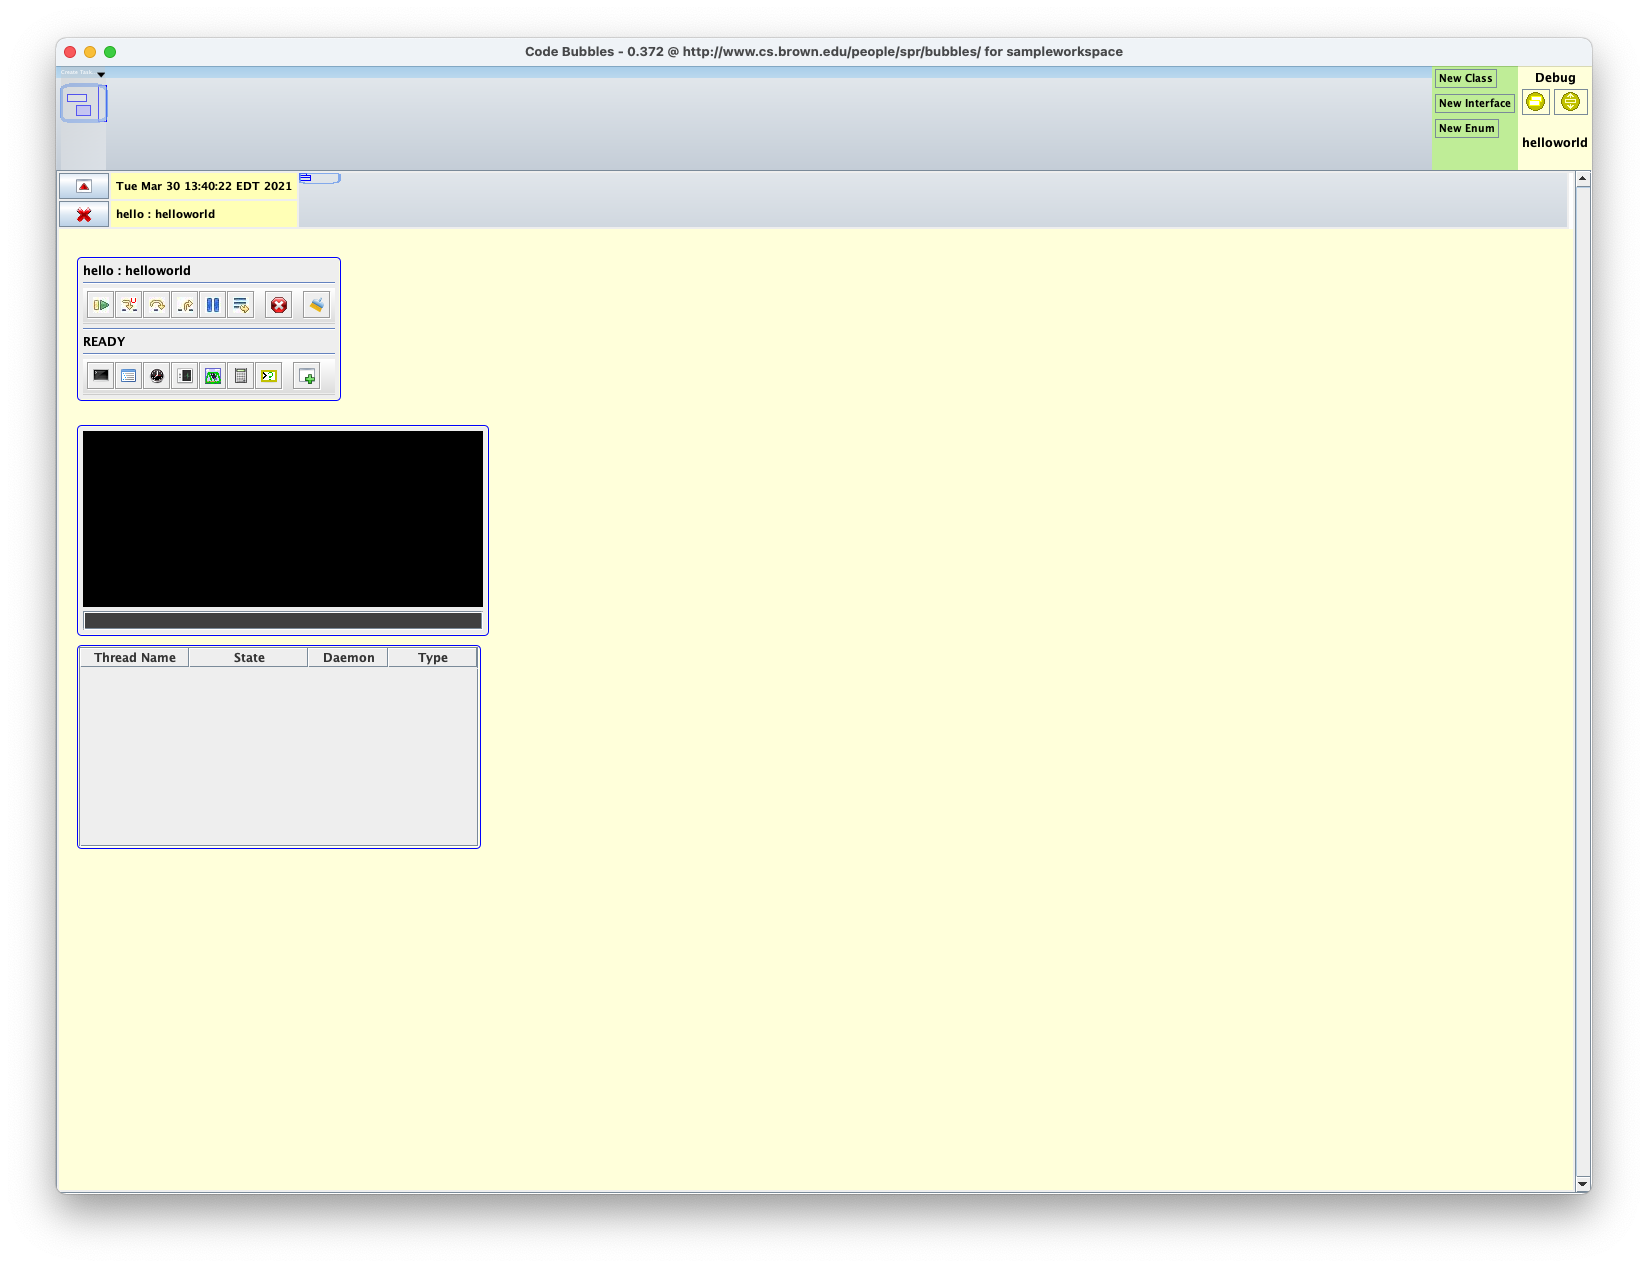
The bubble at the upper left is the debugger control panel. Below that is the console display. Below that is the thread display window. If we now click on the run button (left-most in the top row) of the control window, Code Bubbles starts running the program:
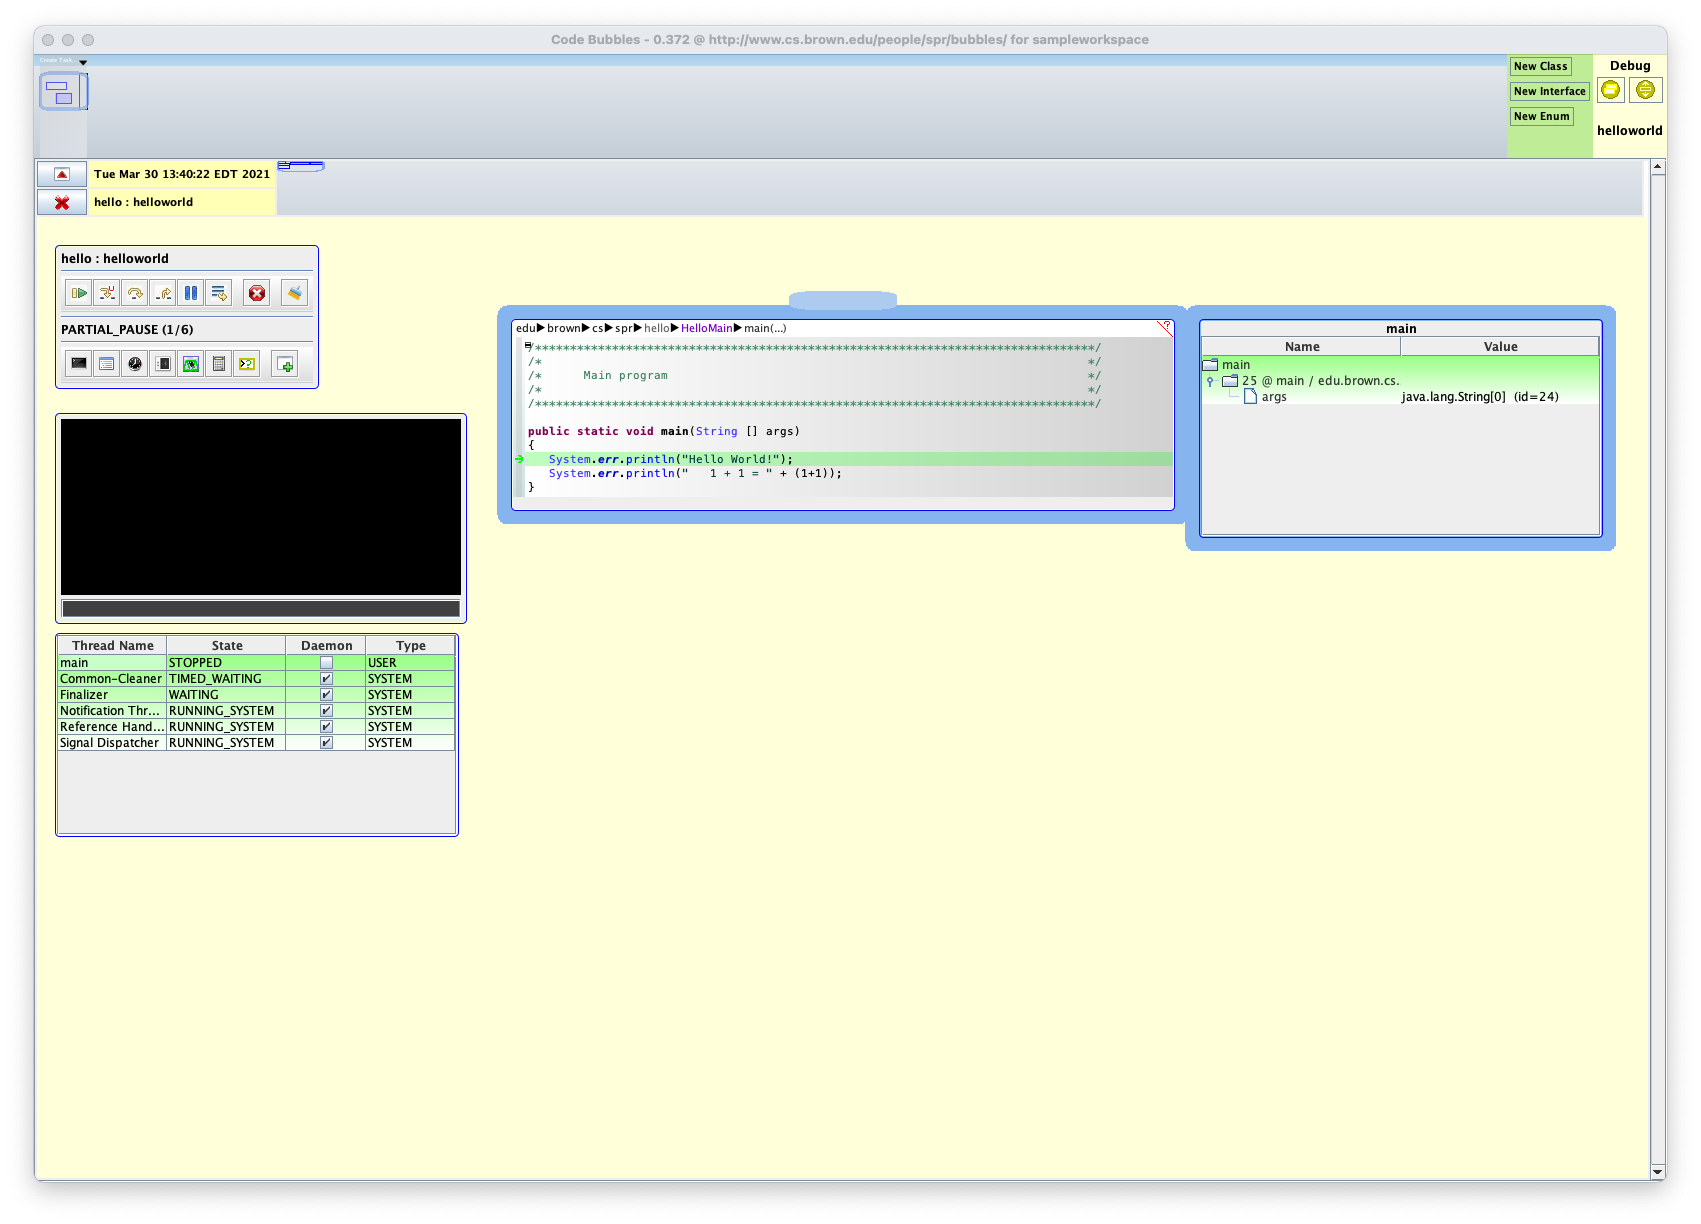
At this point you can use the buttons in the control panel to step or continue execution, or you can set breakpoints by left-clicking in the annotation area of the code bubble (gray area on the left). Once you are done use F2 (or click on the left button on debug) to go back to the main Code Bubbles display (these are both toggles).
-
Installing Plugins
-
Congratulations.
You have now downloaded, installed, and run Code Bubbles. Now is your chance to play with it more, to try out some of the features, and to use it on your own code. When you are done, just close the window and Code Bubbles will exit.
Several Code Bubbles features are available only as plug-ins, not in the default installation. This includes live programming (continuous execution), security checking (flow analysis), UML editing, and, most recently, debugging assistance. Never fear, installing plug-ins is pretty simple.
To install a plug-in, move the mouse to the top of the display (thie blue bar at the very top) and right click to bring up the pop-up menu. From that menu select "Manage Plugins". This brings up a dialog that lets you look at the current set of plug-ins and choose the ones you want to install (or uninstall). Note that for most plug-ins to be usable, Code Bubbles must be restarted.